Our Cargo Trailer Conversion
When Kathy and I started looking for a camping trailer, we had several requirements:
- Light weight: For me, that meant something under 4000 pounds, and lighter if possible. I wanted better gas mileage and easier trailing.
- Maximum length of about 17 feet: again, it's all about the easy handling
- Good ground clearance: The places Kathy and I camp are often well off the main roads. I've read too many stories of RV's disintegrating after long rides down rough dirt roads. Apparently their interiors aren't built to handle that kind of wear and tear.
- Dual axles: yes, a little extra weight, but better and safer towing. I also wanted electric brakes.
- Standing headroom: this was a must on our boat, and now that we have it there, I wouldn't give it up.
- Minimal power requirements: we wanted to be capable of being off the grid, without a lot of power-sucking devices to shorten battery charge. We're used to backpacking and rustic camping; the "extras" only seem to bog one down.
- Good quality build for strength and water-tightness without excessive weight: quality is important.
- Insulated roof and walls; walls finished: I didn't have the time before our first trip to start with a completely bare trailer.
- Sleeps two, Queen bed (60 x 80): The Admiral laid down the law here.
- Shower and toilet: I had to agree with the Admiral here, although I would have settled for an outdoor portable shower/toilet set-up.
- Simplicity (minimal complexity): This should really be the first requirement. I like things as uncomplicated as they can be. Complexity only leads to trouble. How much time have I seen people spend waiting for systems to be fixed on sailboats and RVs, because they broke down and were too complicated to be fixed by the owner? Complexity adds expense and unreliability. We don't need luxury anyway.
We had to rule out all the commercial hard-sided trailers right off the bat. They were too heavy, and didn't offer a Queen size bed in a small trailer. We looked at some pop-up trailers that came real close to fitting our requirements, but we didn't like the set-up time or the less-than-ideal critter proof nature of these trailers.
The idea of converting a cargo trailer to a camping trailer appealed to me for several reasons:
- I could get exactly what I wanted
- It could be dual use, if I made the components either easily removable or kept the bulk of the interior fittings out of the way for use as a cargo trailer.
- It was certainly cheaper than a commercial trailer.
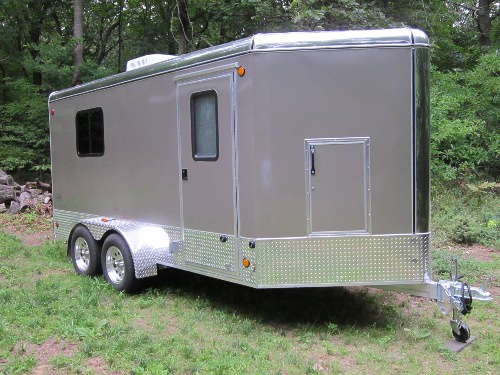
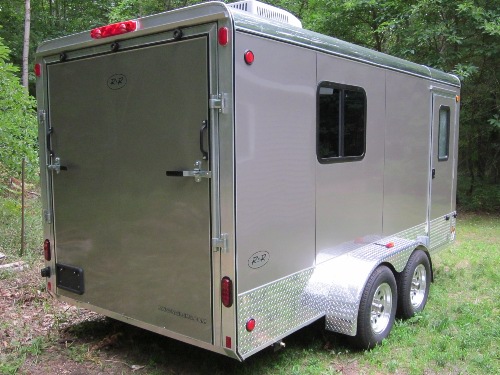
I found a great manufacturer in RNR Trailers in Three Rivers, MI. I explained my needs, and ended up with one of their all aluminum 17-foot V-nose trailers. I had them install a roof air conditioner, AC outlets, RV door, front access door, two opening windows, styrofoam insulation and finished walls. They pulled a wire so I could easily install a house battery. I had them install a Fan-Tastic vent in the ceiling, too.
The trailer was ready for delivery just as our annual family reunion was finishing up at our place. Our first trip was planned for a mere few weeks later--a trip all the way to Colorado. It was clear we would not have time to finish out the trailer in its final form. The plan, instead, was to make a primative build-out, sufficient to get us through the trip and allow us to identify what we wanted in a final build.
Build v1.0
The first step was to get a floor covering. We don't know what we will ultimately end up with, but a rubber rolled flooring would be waterproof and easy to clean. We found G-Floor Garage Floor Protector to be an ideal solution (hat tip to Gadget Man on Teardrops n Tiny Travel Trailers forum); Menards had the best price. Meanwhile, Kathy found a queen-sized memory foam mattress on sale at Costco. Her mom, Betty, got busy making curtains for the trailer. I modified a slatted platform bed frame plan I found online to make it stronger, wider between the upright posts and taller (for extra storage underneath).

The bed frame as designed
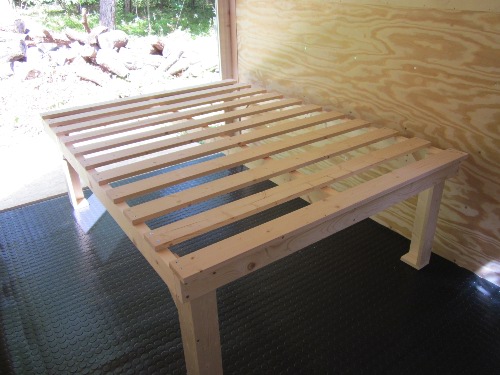
The bed frame as built
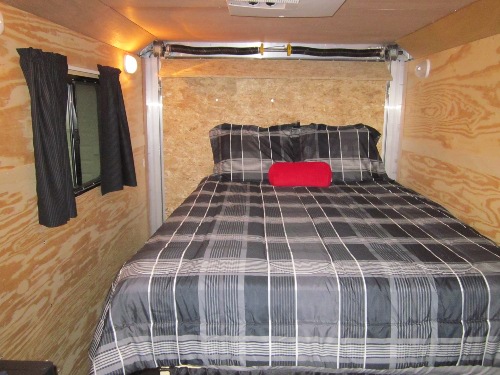
The finished product
We had an old group-27 battery lying around that we had used for the motor on the Windrider. I had kept it charged, but had no idea of its storage capacity. We elected to use it anyway. I wired it into the existing wiring and added a GUEST ChargePro 10-amp, dual battery charger. It would allow me to add a second battery in the future.
I wanted a cooking surface that could be used inside or out, and a Coleman propane stove would serve that purpose. I originally planned to build a cabinet for it, but Kathy located a plastic cabinet that would work well (made by Enviro Elements and purchased at Lowes). By storing some cast iron pans in the bottom, it became very resistant to falling over.
The sink area gave me headaches for a while, trying to decide what to do that would be quick and inexpensive. Finally I found a portable plastic dual sink on Amazon.com that would make a great countertop when the legs were folded up, and could be moved outdoors, if we so desired. All I had to do was to build a base cabinet. I planned to have a shelf in the cabinet and doors on it, but time ran out. We made curtains to cover the opening. The fresh water and gray water tanks would be stored beneath along with the battery. Coming from our sailing background, a Whale foot pump [now called a Whale Babyfoot Galley Pump] served to deliver water to the faucet. I had ordered a marine faucet, but didn't know how to best install it on the plastic table with two sinks, so elected to make a temporary faucet out of a piece of copper pipe and a wooden frame. It could be moved where it was needed.
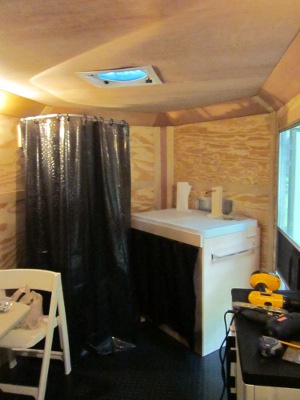
Original Kitchen and Bath
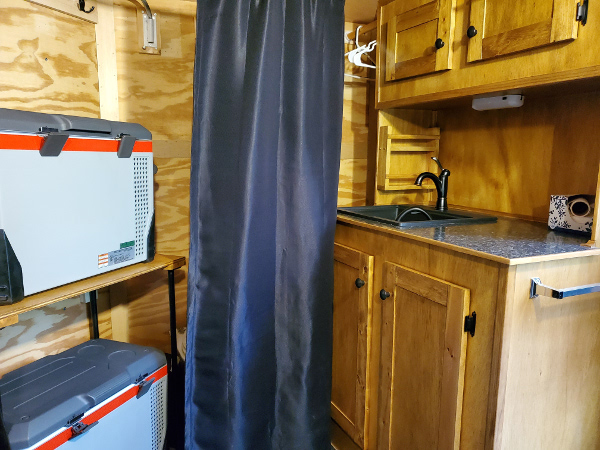
2020 version of the kitchen (details below)
To create a private bath area, I originally thought of a PVC-based design, but a friend with some welding ability bent some conduit to form a shower rod and made a mounting to attach it to the walls. We found a rubber basin to serve as a base for a shower, and I rigged a pressurized sprayer [originally sold by Duckworks Boat Builders Supply, but no longer available—I later changed to a black hand-pressurized garden sprayer with a garden spray nozzle attached to it] to use for a shower. A Luggable Loo served as a simple but sufficient toilet.
For a dinette, we elected to use plastic folding chairs and tables we already owned. We could deploy them or store them as needed. One folding table also serves as an outdoor cook surface.
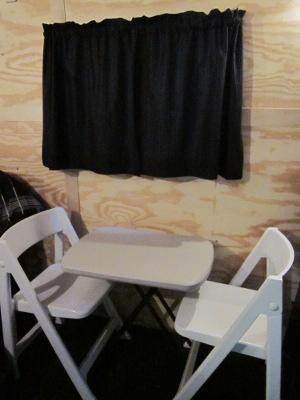
Our temporary dinette
Update (September 2013)
In anticipation of our Fall vacation to Michigan's Upper Peninsula, I made a bench seat for the trailer. It was to serve two purposes: seating at the portable table and additional interior storage space. It worked well for both. The seat was constructed of 1x4 lumbar with 1/2" oak plywood sides and top. The top lifts out for interior access. Kathy's mother made the cushion to match the existing color scheme. I think I will rebuild the sink area in the future to make it lighter, using the 1x4 framing rather than the 2x4 framing it currently has. I'll likely also go to one sink rather than the double (we just don't use the second side much), but keeping the counter space.
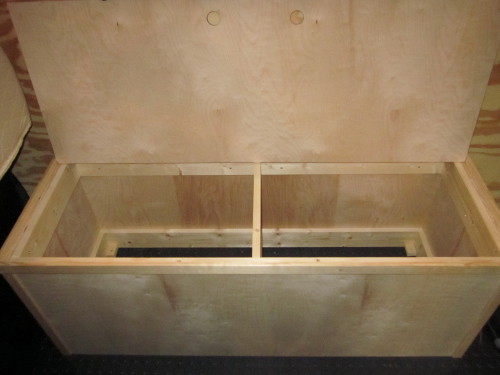
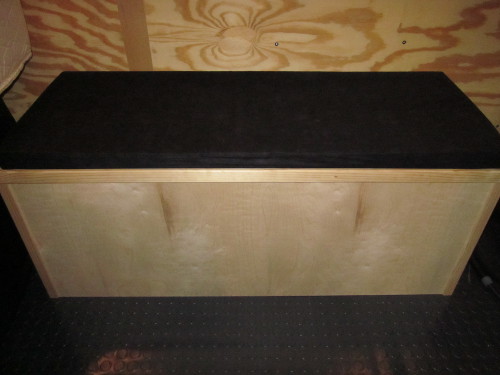
Our bench seat provides seating for the table and a lot of storage below
We have found that we tend to use the shower facilities at State Parks, so we've left the shower curtain around the bathroom area pushed back and placed a curtain that runs the width of the trailer just in front of the bench seat. When closed, the forward portion of the trailer provides a roomier private area than the tiny space created with the bath curtain.
Update (June 2014): build v2.0
This Spring I finally got around to rebuilding the sink area. I liked the 1x4 construction of the bench from a weight and strength perspective and decided to employ it for a full-fledged kitchen cabinet. I also expanded the cabinet from just a sink area with storage below to a complete cabinet with doors and overhead storage. I really liked the results, although we did spend more than intended by the time we found a sink and faucet combination we liked. I stained the bench seat and kitchen cabinet to match and then used spar varnish to protect against water spills.
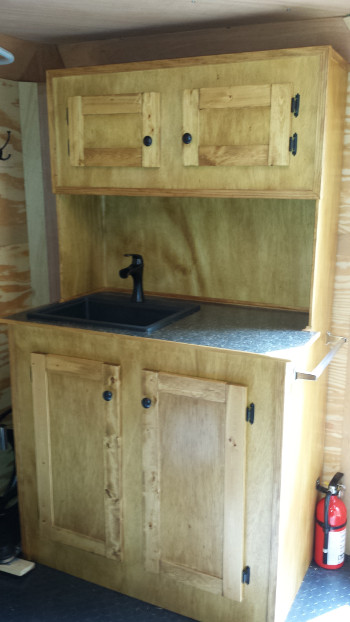
The new kitchen cabinet
Update (July 2014)
Many times at night, Kathy and I will relax in the bed, with our backs against the wall. We each have a light over our shoulder, perfect for a little reading or computer work. I decided to add a drop-down table there to hold our cocktails and store reading material. The table surface is made of left over laminate from the kitchen counter. I raised the trim around the top to provide a recessed surface on which to store glasses, a flashlight, cell phone or whatever else we want at hand when we're sleeping.

A drop-down table over the bed makes for a convenient place to set our drinks while we read at night.
Update (March 2018): Solar charging, Composting toilet, Refrigerator, LED lighting
I discovered I hadn't updated this page in a while. There have been a few changes to the trailer over the past few years. Fist, we added solar panel charging capability. I wanted a panel that was portable, so I could either place it on the roof of the trailer (its usual site) or off to the side a bit if we were parked in a particularly shady area. I ended up with a Kyocera 140 watt panel paired with a Genasun MPPT Solar Controller, a combination that works very well keeping our battery topped off, even in partial shade.
The Luggable Loo has been replaced by the more functional and aesthetically pleasing C-Head composting toilet. We have one our our boat as well and have enjoyed it. I used a computer fan and some drain hose to vent it out the nose of the trailer, but rarely use the active vent (we haven't needed it).
I added a narrow hanging locker (closet) between the bench seat and toilet/shower area. We used it for one trip, then removed it. It was a nice bit of added storage, but we decided the space was better used for an AC/DC refrigerator, which we really enjoyed having. We purchased an Engel 40-quart marine refrigerator/cooler that works great and reduces our need to purchase ice to keep our food cold.
The most recent update was the addition of LED lighting. The trailer came with six wall-mounted dome lights made by Command Electronics in Schoolcraft, MI. A visit to their website revealed they now had LED versions of the same lights. I replaced all six with the 30 LED version (it also comes in a 21 LED version). I now get more light out of three lights than I previously did with all six turned on. I can run all six for less electricity than one of the old ones. Very nice!
Update (May 2019): Floor covering
Although the rubber mat floor has been very durable and easy-to-clean, it contracts and expands an amazing amount over the seasons. In the process, it pulls out the screws I use to anchor the furniture to the floor, which isn't ideal. I decided to attach the furniture directly to the floor, cutting out rubber mat sections to cover the portions of floor inside the furniture and under the bed. The remaing parts of the trailer will now be carpeted with dark gray indoor-outdoor carpeting.
Update (July 2019): Electrical System
I finally got around to installing a proper fuse box for the 12V electrical system. Not only is it safer, but it helped a lot with the organization of wires. Previously, everything was wired directly to the battery. I also wired in a dual port USB charger to handle all our small electronics charging needs. I like that it has a digital voltage reading to give me a quick glance at my battery status.
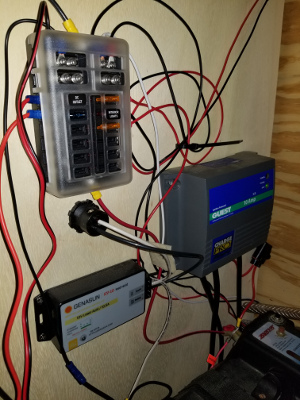
The electrical distribution system.
Update (November 2019): Cover
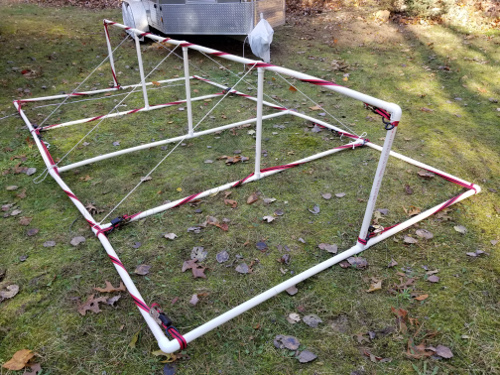
I've been asked about my trailer winter cover, so I thought I would add some pictures demonstrating my system. I built the frame out of PVC pipe, which gives me the ability to break it down for storage once the snow season is over. The frame is sloped to make snow and water shedding better and allow air circulation between the tarp and trailer roof.
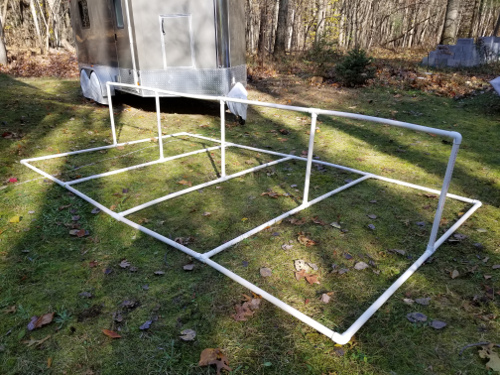
The PVC frame has been assembled prior to placing it on the trailer roof.
The frame has been reinforced using several ratcheting straps. Nylon line was then strung from the lateral tube, over the top tube and down to the opposite lateral tubing to help support the tarp.
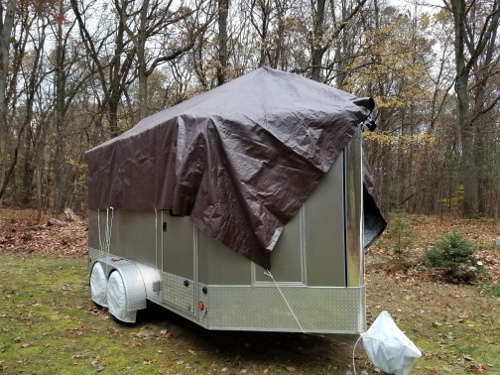
The frame has been placed on top of the trailer and covered with a tarp, which was then secured to the trailer.
Update (June 2020): Interior improvements
After last September's trip out west, we are convinced the ability to expand to two refrigerators is occasionally really useful. I built a two shelf system. The bottom shelf will always have a refrigerator on it; the upper either has room for a second refrigerator (or freezer), or can be used for another working surface when in camp.
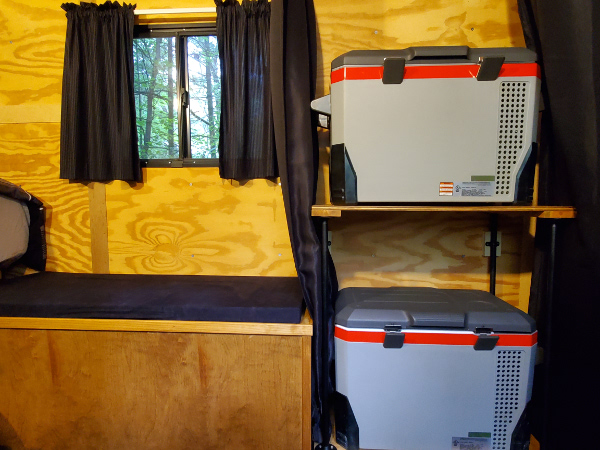
New shelving for the refrigerators
In a constant attempt to improve organization and add storage, I built a spice rack in the kitchen unit, added a small shelf over the mirror to store contents of my pockets when I unload them, hung up a couple of hooks for key rings and added a small clothes rod between the kitchen unit and the wall.
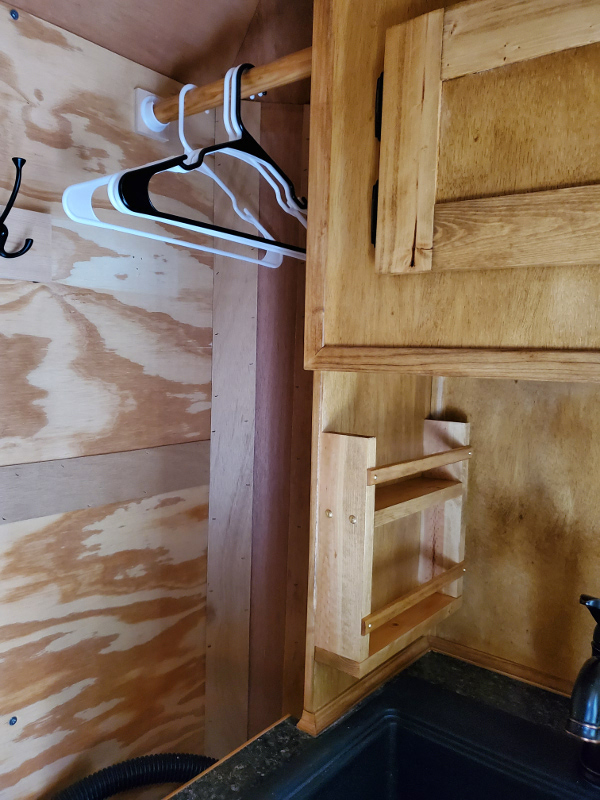
New spice rack in kitchen unit and clothes hanger bar between kitchen unit and wall.
Finally, I built a new top for the cooking cabinet that is slightly larger, allowing the stove and gas cannister to fit better when it is set up.
New wood top for the cooking cabinet. You can see a small shelf above the mirror for pocket contents.
Disaster Stikes (October 2021)
After an hiatus of maybe six weeks, I went out to check on the "Hobo Trailer". Opening the door, I was greeted with an otherworldly sight—the trailer interior was covered in mold! Not just a little mold either, but mold covering and hanging from everywhere. To say I was stunned would be an understatement. I couldn't believe what I was seeing. How could this happen? Investigating a little further revealed what appeared to be wet wood around the side of the roof-mounted air conditioner. Apparently, a fairly significant leak developed and completely soaked the queen-sized mattress below. In the heat of the summer, the mold exploded. I fear the only solution is to gut the trailer, interior walls and ceiling included, and rebuild. So, building on the experience we've gained with the two previous builds, we will now start creating Version 3.0.
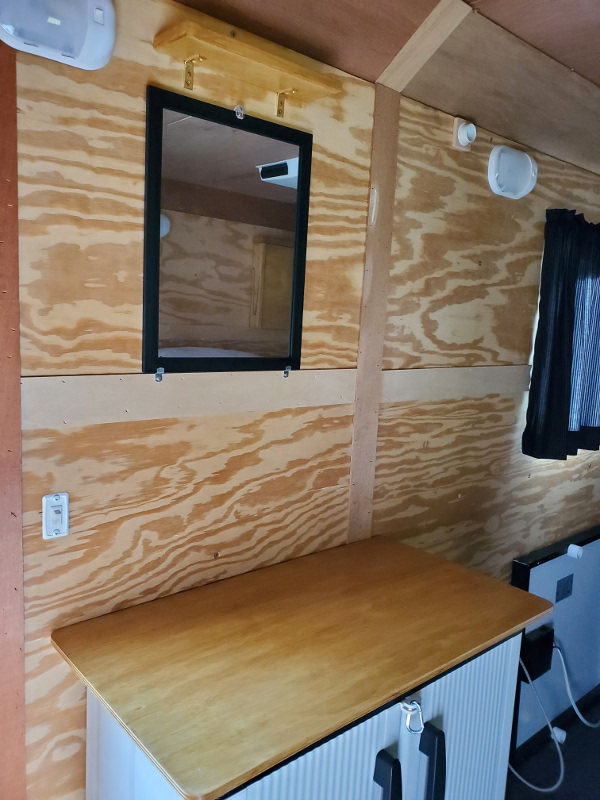
Build V. 3.0
The first step was to tear out all the furniture, walls and ceiling and have a massive bonfire.
Kathy discovered a Novafoam Queen-sized ComfortGrande™ Plus 14” Gel Memory Foam Mattress on sale at Costco, so it became our first purchase for the new build (remember, a queen-sized mattress was one of her non-negotiable requirements for a camping trailer). One of the few pieces of furniture I was able to partially salvage from the mold disaster was the outer frame and legs of the bed frame, so the new mattress should play well with that.
The saga comes to an end
We received an offer for the cargo trailer. I had removed all the interior walls and ceiling panels and burned them, but there was still some damaged wood present between the frame and the aluminum roof sheeting. For the new build, I was planning on replacing the aluminum roof, so there would be no openings in it. While I was searching for someone to do the roof replacement, I received an offer on the trailer from someone who wanted to use it as a tool trailer. We accepted the offer, and the former "Hobo Trailer" left for a new home.
Now we are investigating our options for the next phase of trailer camping. Will it be a pre-built commercial trailer, another homemade conversion, or something else entirely? Only time will tell.